Kitchen Accessibility for Low Vision: Contrast, Tactile Markers & Safer Food Preparation
Practical ways to make food preparation easier with low vision using contrast, tactile markers, better lighting, organization, and accessible kitchen tools.
Reviewed for clarity and usefulness. How we publish
Editorial Independence & Disclosure: LowVisionGuide.org is supported by its readers. When you purchase through links on our site, we may earn an affiliate commission at no extra cost to you. We only recommend products verified for task utility and low-vision accessibility. Read our full Editorial Independence Charter.
1. Executive Summary & Adaptive Kitchen Philosophy
Cooking, meal preparation, and appliance operation are central to daily independence. However, standard kitchen environments present significant visual obstacles for individuals with low vision caused by age-related macular degeneration, glaucoma, diabetic retinopathy, or stroke. Stainless steel appliances with smooth touchscreen displays, white countertops with light-colored cutting boards, and deep overhead cabinets can conceal hazards and make routine tasks frustrating.
Adapting a kitchen for low vision does not require an expensive remodel. Effective accessibility rests on six practical environmental controls: high-contrast surfaces, tactile identification, focused glare-free task lighting, stable work surfaces, task-oriented organizational systems, and appropriate specialty tools.
Safety & Scope Precedence: This guide focuses strictly on environmental adaptations, spatial organization, contrast enhancement, and tool selection. It does not prescribe clinical knife hand-positioning, specialized blind-slicing techniques, or hot-liquid pouring methods. Complex physical adaptations involving sharp tools, open flames, or heat sources should always be practiced under the direct, hands-on guidance of a certified occupational therapist (OT) or vision rehabilitation therapist (VRT).
2. Task-Oriented Kitchen Adaptations
|
Functional Kitchen Task |
Primary Visual Barrier |
Environmental Adaptation Strategy |
Recommended Tool / Aid
|
|
Slicing & Chopping |
Low contrast between food and cutting surface; hidden blade edges |
Pair light foods with dark surfaces and dark foods with light surfaces |
Reversible high-contrast cutting boards; high-contrast knife handles |
|
Measuring Liquids & Solids |
Faint embossed lines on clear plastic cups; low fluid-line visibility |
Use solid, high-contrast measuring cups or tactile/audible measuring devices |
Nested high-contrast measuring sets; tactile liquid level indicators |
|
Appliance Dial & Touchscreen Operation |
Flat glass touchpads; uncalibrated smooth knobs; low-contrast print |
Apply tactile indicators to essential temperature, power, and time settings |
Self-adhesive tactile bump dots; high-contrast dial markers |
|
Pantry & Cabinet Search |
Shadows under wall cabinets; visually identical cans and spice jars |
Eliminate dark corners; create distinct high-contrast storage zones |
Under-cabinet LED strip lights; high-contrast tactile container labels |
|
Surface Navigation & Spill Control |
Glossy countertops reflecting ceiling glare; slick items sliding on counters |
Anchor prep areas with matte, high-contrast, non-slip matting |
Non-slip rubber work mats; matte counter liners |
3. Contrast & Color Accentuation in Food Preparation
When visual acuity or contrast sensitivity declines, objects with similar light-reflecting qualities blend together. A white onion on a white cutting board resting on a beige quartz countertop is virtually invisible to a person with reduced contrast sensitivity.
The Light-Dark Contrast Rule
The simplest way to restore edge visibility is to pair opposing tonal values, a technique also recommended in Hadley's low vision kitchen tips:
- Light Foods (onions, potatoes, cauliflower, apples, white bread): Prep on a solid dark black or deep navy cutting board.
- Dark Foods (cucumbers, broccoli, steak, dark plums, rye bread): Prep on a solid bright white cutting board.
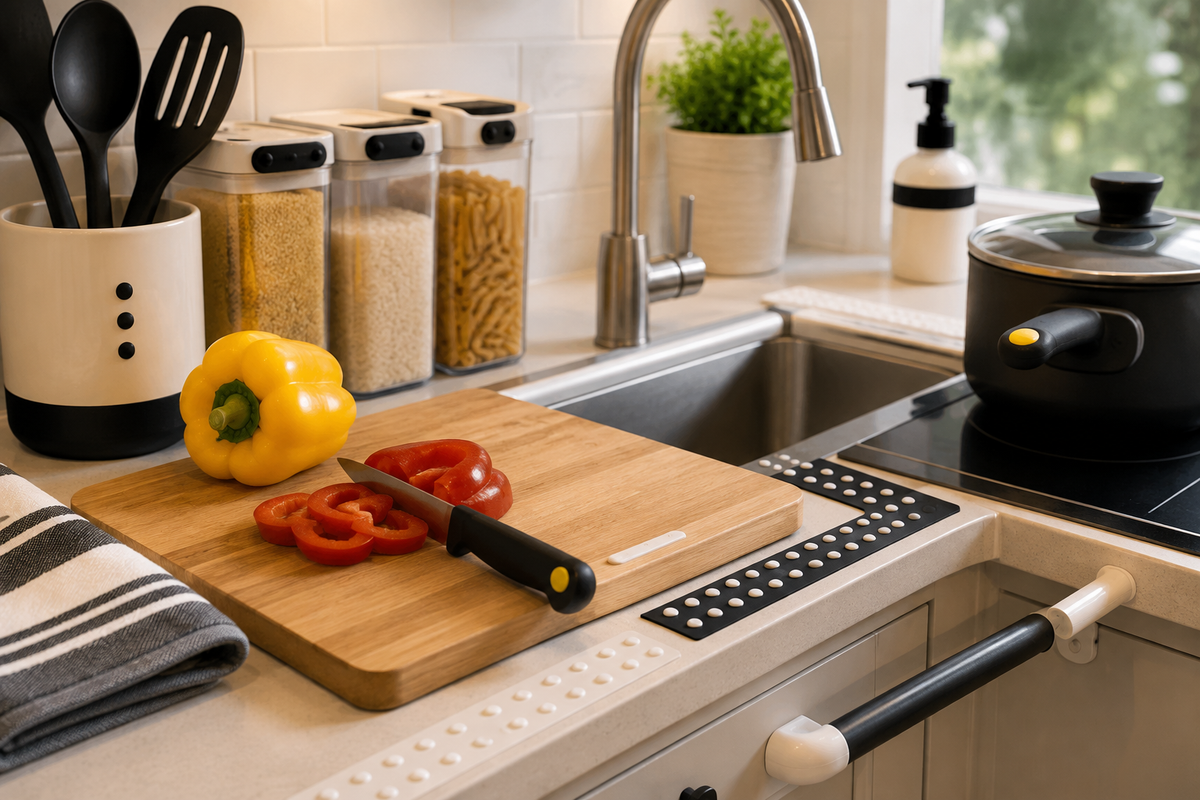
- Countertop Separation: Place a high-contrast non-slip silicone mat beneath the cutting board. This defines the prep zone boundary clearly against the surrounding countertop and prevents the board from sliding during use.
Improving Utensil & Tableware Visibility
- Knives & Utensils: Select tools with brightly colored or high-contrast handles (e.g., yellow, red, or high-contrast black) rather than brushed stainless steel, making them easy to identify on any surface.
- Plates & Bowls: Avoid patterned or busy dinnerware. Solid high-contrast tableware (e.g., dark blue plates for light foods, white plates for dark foods) highlights food boundaries and reduces spills.
4. Tactile Identification & Appliance Controls
Modern kitchen appliances increasingly feature sleek, flat touchscreens or smooth control knobs with small grey lettering. These controls offer zero visual or physical feedback for individuals with low vision.
Applying Tactile Bump Dots
Tactile bump dots are self-adhesive raised markers available in various shapes, sizes, and colors (clear, orange, black). They transform smooth glass panels and featureless dials into touch-accessible controls, an approach outlined in the American Foundation for the Blind's independence tips for low vision:
[Stove / Oven Setup]• High-Contrast Raised Dot on "OFF" position• Distinct Round Dot on 350°F (Bake baseline)• Orange Clear-Sight Dot on Broil or Surface Burner Medium
[Microwave Setup]• Raised Dot on "START" / "+30 Sec"• Distinct Textured Dot on "STOP / CLEAR"• Single Dot on "1" or "3" for quick minute increments
By placing a tactile marker at key operational settings, you can operate appliances by feel without squinting or relying on a magnifier while handling hot items.
Tactile & Large-Print Storage Identification
- Rubber Band Cues: Place distinct rubber bands around canned goods or jars to differentiate similar items (e.g., two rubber bands around chicken soup, one around tomato soup).
- Large-Print & High-Contrast Labels: Mark spice containers, flour bins, and storage drawers using thick black permanent markers on bright white adhesive labels or high-contrast label tape.
5. Task Lighting, Glare Management & Stable Surfaces
Standard ceiling light fixtures flood the center of the kitchen with ambient light but leave work surfaces beneath wall cabinets in deep shadow. Relying on ceiling lights forces you to lean forward into your own shadow when preparing food.
Under-Cabinet Task Lighting
Installing bright, direct under-cabinet LED light strips casts shadow-free light directly onto cutting boards and prep areas. Choose dimmable LED fixtures with diffuse lenses to eliminate raw bulb reflection on glossy granite or quartz countertops.
Managing Glare
- Cover polished, reflective countertops with matte, non-glare silicone prep mats.
- Adjust window blinds or install sheer shades to diffuse direct sunlight streaming across kitchen work surfaces.
Creating Stable Workstations
Stability prevents accidental slips and spilled liquids. Always ensure cutting boards, bowl stands, and tray assemblies are anchored with non-slip rubber grips or wet-paper-towel underlays before starting a task.
6. Safe Tool Selection & Environmental Safety Controls
When selecting kitchen equipment for low vision, prioritize tools designed with built-in safety margins, high physical stability, and clear visual contrast:
- High-Contrast Measuring Tools: Replace clear plastic measuring cups with sets featuring bold, raised, high-contrast numbers on solid black or bright yellow plastic.
- Audible & Tactile Liquid Level Indicators: These compact electronic devices hang over the rim of a mug or pot, sounding a buzzer or vibrating when liquid reaches the fill line to prevent overfilling.
- Safety Food Holders & Finger Guards: Stainless steel or high-visibility plastic guards hold vegetables securely while shielding fingers during slicing.
- Long Heat-Resistant Oven Mitts: Use silicone or Nomex oven mitts that extend well up the forearm to protect against accidental contact with hot oven racks or vessel rims.
7. When to Seek Professional Vision Rehabilitation
While environmental adaptations significantly improve ease and safety, learning specialized non-visual techniques requires expert guidance. If you or a family member feel hesitant about cooking safety, burning risk, or knife handling, request a referral to an occupational therapist specializing in low vision or a Certified Vision Rehabilitation Therapist (CVRT).
A rehabilitation professional provides personalized home instruction in:
- Safe non-visual knife mechanics and blade positioning.
- Tactile spatial mapping of stove burners and hot cooktops.
- Safe techniques for tracking, lifting, and pouring hot liquids.
- Custom kitchen layout reorganization tailored to specific visual field loss.
Recommended Products
Products below are grouped by source. Visible Living carries specialist low-vision equipment relevant to this guide; the Amazon links cover general daily-living kitchen aids that aren't part of VL's specialist catalog.
From Visible Living
- Stella EDGE LED Clamp Lamp — shadow-free task lighting for cutting boards and prep areas, addressing the under-cabinet lighting gap described in Section 5.
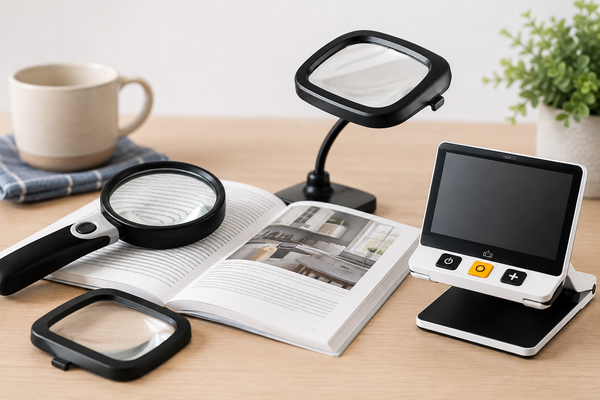
- Carson MagniLine MT-25 LED Bar Magnifier — built for recipes, labels, and menus.
- Carson MagRX RX-55 Prescription Bottle Magnifier — for reading medication labels commonly stored in the kitchen or pantry.
From Amazon (affiliate links — see disclosure above)
- Tactile bump dots, 106-piece combo pack — the self-adhesive markers described in Section 4 for stove, oven, and microwave controls.
- Easy Say Stop audible liquid level indicator — clips to a cup or pot and sounds an alert as liquid nears the top, referenced in Section 6.
- High-contrast measuring cups and spoons set — bold, large-print markings on solid-color plastic.
- Talking kitchen scale with large-print display — voice announcement plus large numbers for weighing ingredients.
8. Related Guides & Internal Links
Expand your home accessibility setup by exploring related guides in our Daily Living series:
- LVG-DL-002: Home Lighting and Contrast Solutions — In-depth strategies for glare control, ambient lighting, and room-by-room contrast.
- LVG-CONT-003: Video Magnifiers & Digital CCTV Explainer — Using electronic desktop and portable cameras to read fine recipe print and package labels.
Sources
- Hadley — Low Vision Tips at Home: Kitchen
- American Foundation for the Blind — Independence Tips for Low Vision Awareness Month
- APH ConnectCenter (VisionAware) — Understanding Vision Rehabilitation
Educational Disclaimer
This guide is provided strictly for educational and environmental adaptation purposes. LowVisionGuide.org does not offer medical advice, clinical rehabilitation, or hands-on occupational therapy instruction. Product references may link to items available through Visible Living LLC or affiliate partners. Always consult a certified occupational therapist, low-vision optometrist, or vision rehabilitation specialist for individual safety evaluations and hands-on skill training.